SSO/SAML Okta Configuration
6 min
Prerequisites
- Create a Swimlane user with an email address that will be used across all steps.
- Make sure the Swimlane URL in Advanced Configuration is the one that is used across all steps.
Configuration
- Create an account on Okta Developer (If you already have an account, you can create a Person in the organization with the same email address as the prerequisite. If not, use the same email address to make it easier).
- Create a New Application and select SAML 2.0 as the Sign-on method.
- Fill the App name and click next
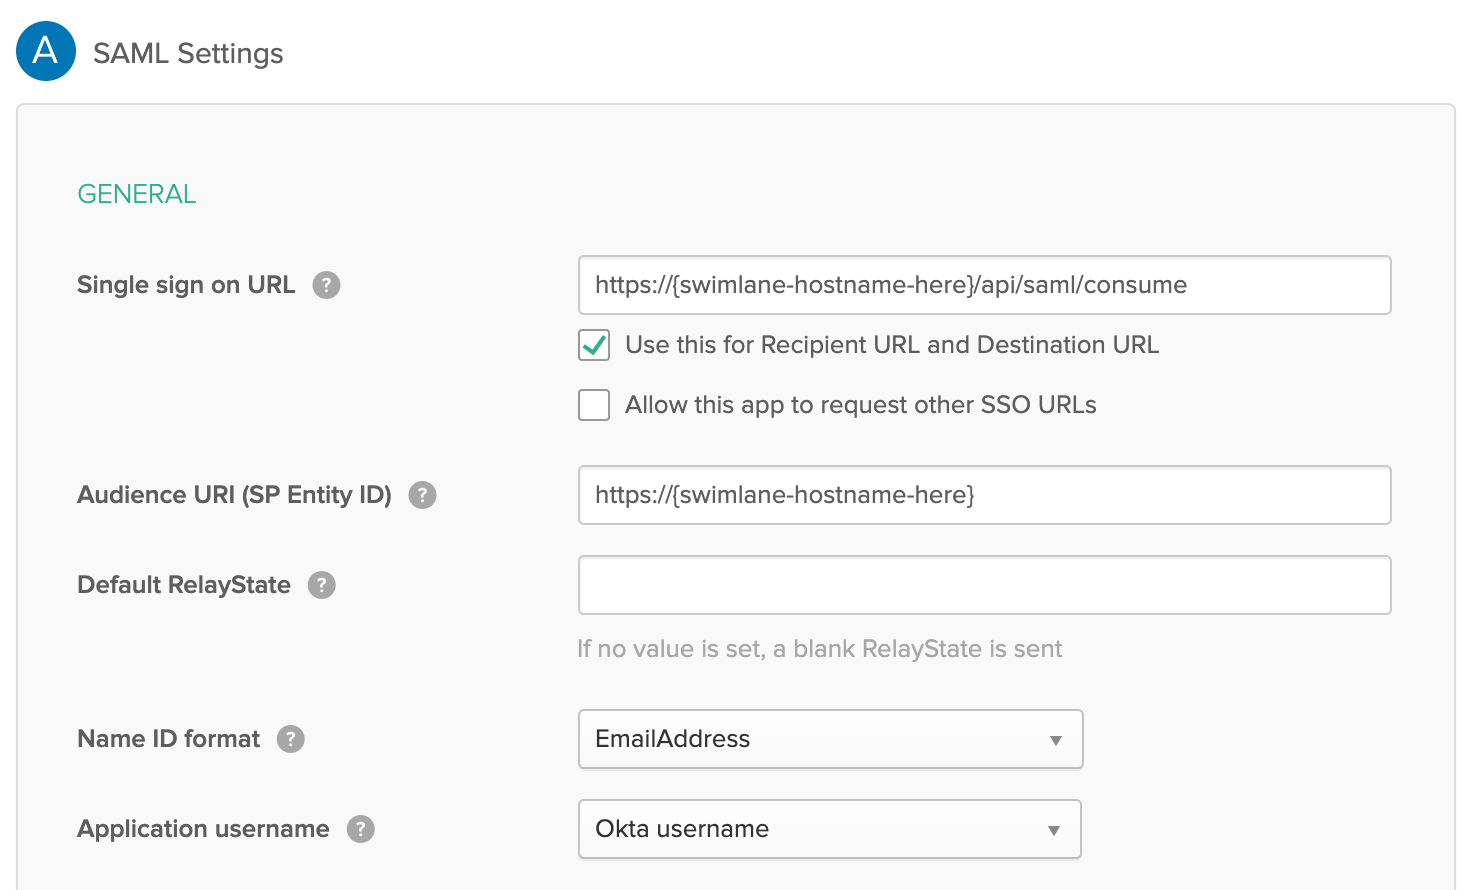
- Configure the SAML Settings as follows (replace the hostname value)
SAML SETTINGS:
- Click Finish
- Navigate to the new Application and click the Assignments tab.
- Click Assign to People. In this case, add the Person with the same email address as the prerequisite
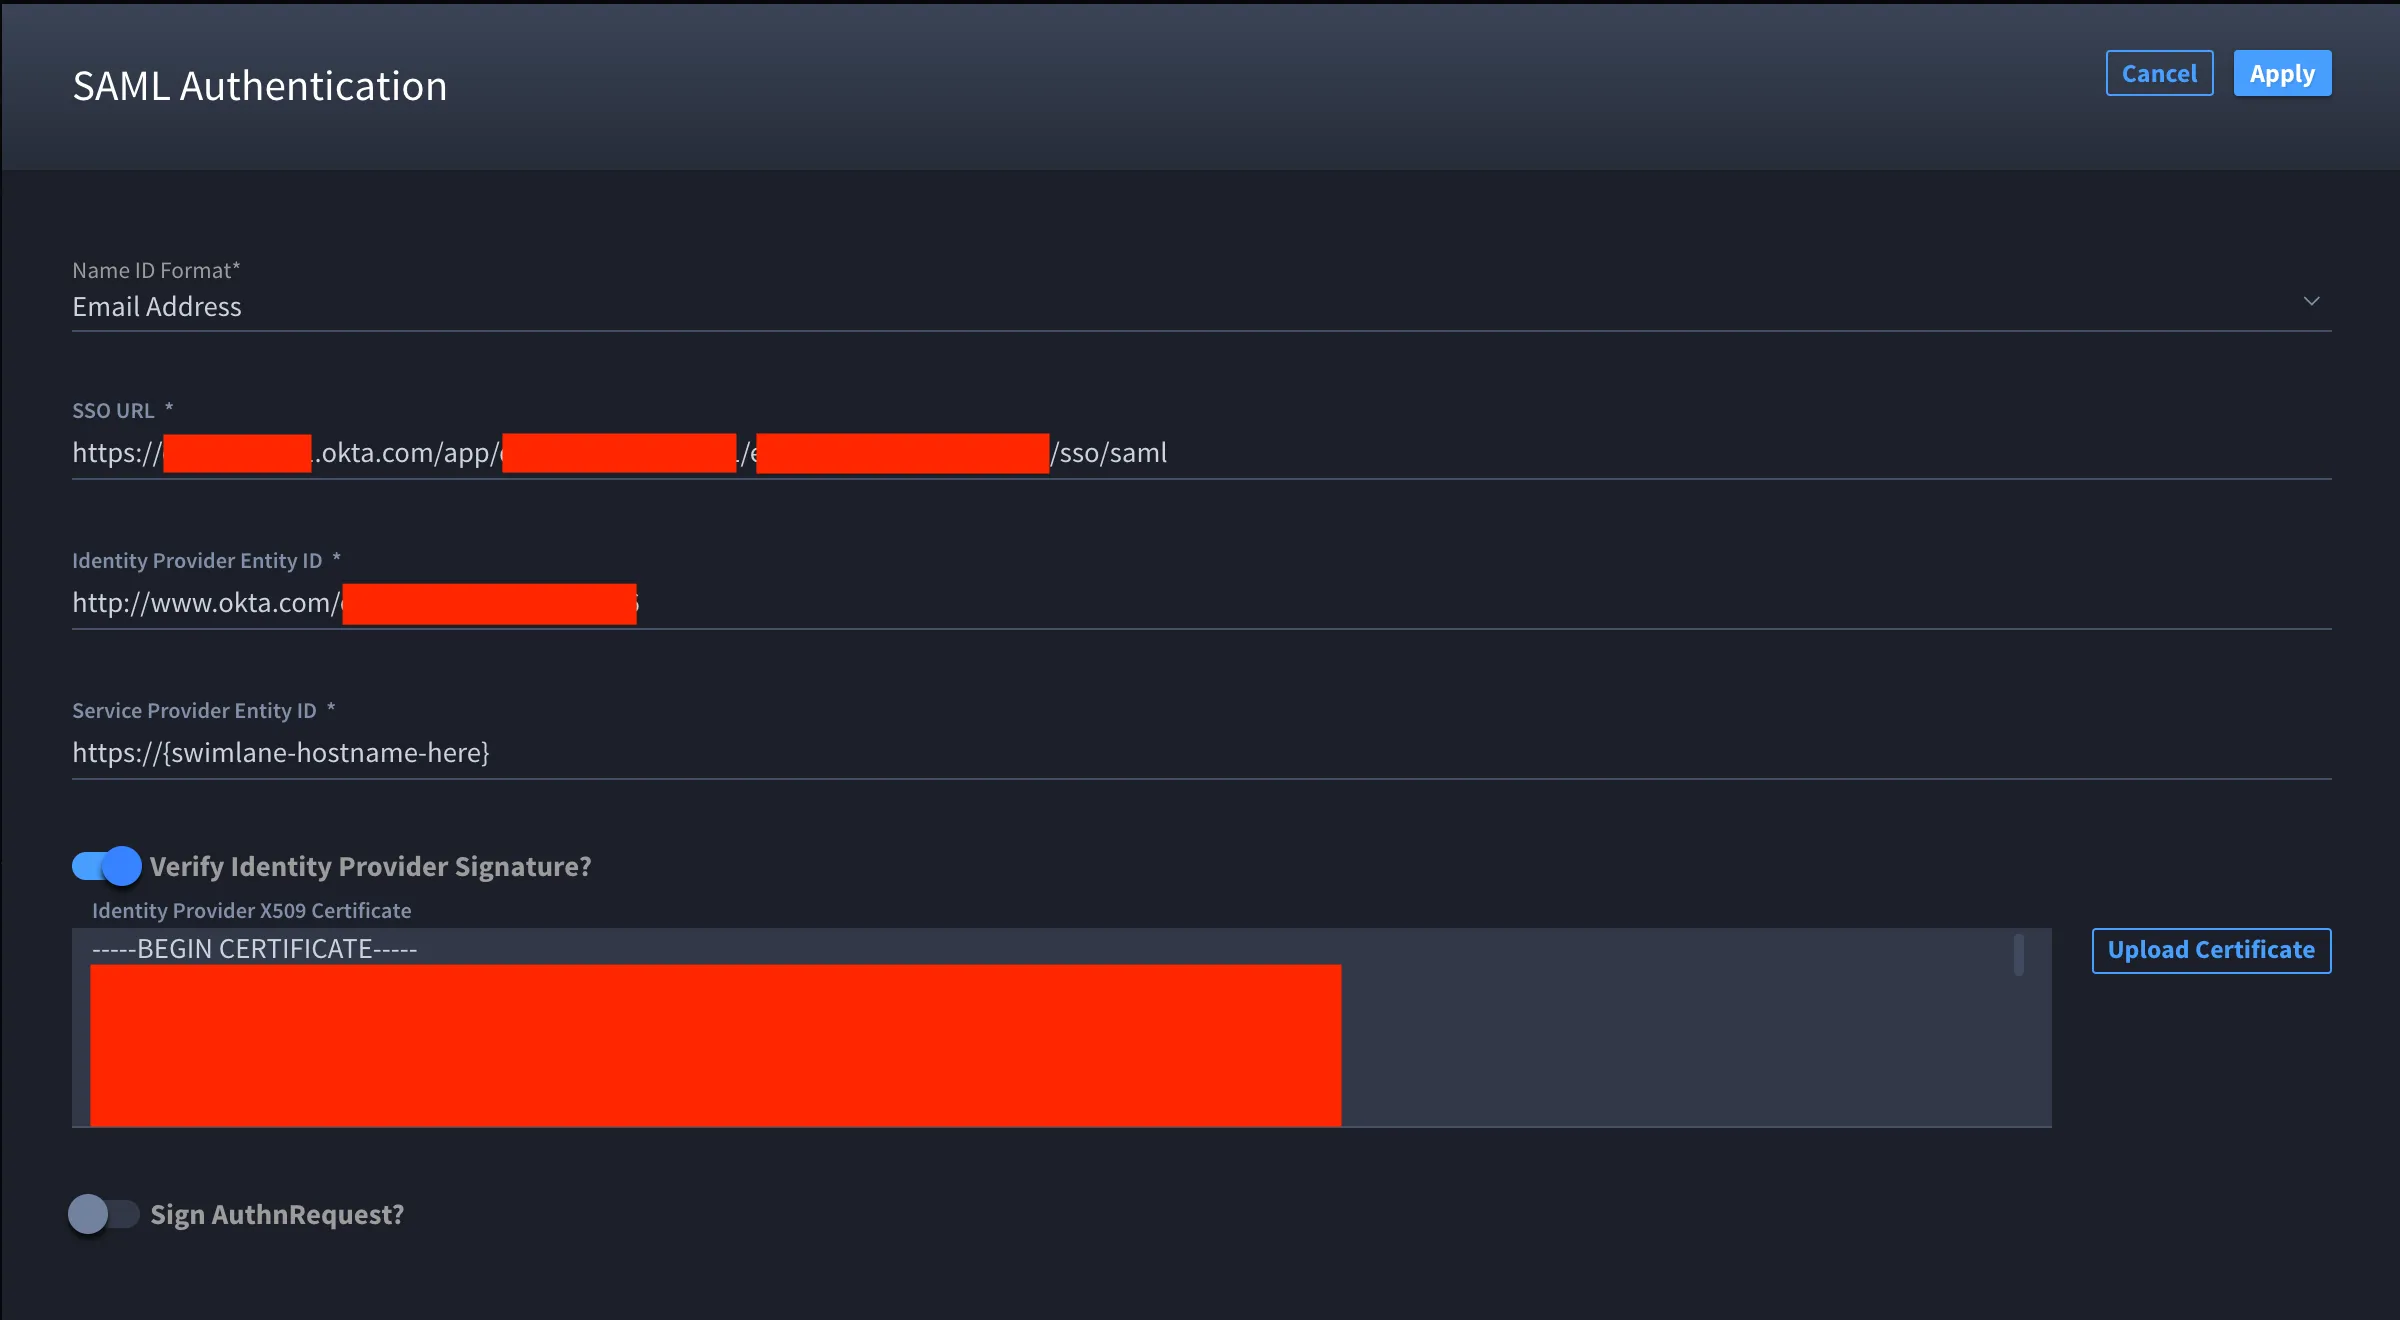
- Now click the Sign On tab, select the View Setup Instructions button, and copy the values in the Swimlane SAML Authentication dialog.
- Select Email Address in the Name ID Format field
- Identity Provider Single Sign-On URL → SSO URL
- Identity Provider Issuer → Identity Provider Entity ID
- Fill the Swimlane host name in the Service Provider Entity ID field
- X.509 Certificate → Identity Provider X509 Certificate
- Save the configuration and login by clicking Login via SSO in the login page.
SSO/SAML Azure AD Configuration
Prerequisites
- Create a Swimlane user with an email address that will be use across all steps.
Configuration
- Create an Azure account
- Navigate to the Azure Active Directory service and add a User with the same email address as the prerequisite. (Invite the user if the email address is different from the organization).
- Create a new Enterprise Application.
- Click on Create your own application
- Fill in the app name and click Create
In the application menu, assign the user we created in Step 2
- In the application menu, click on Set up single sign-on.
- Select SAML as the single sign-on method
- In the Basic SAML Configuration section edit the configuration as follows (replace the hostname value):
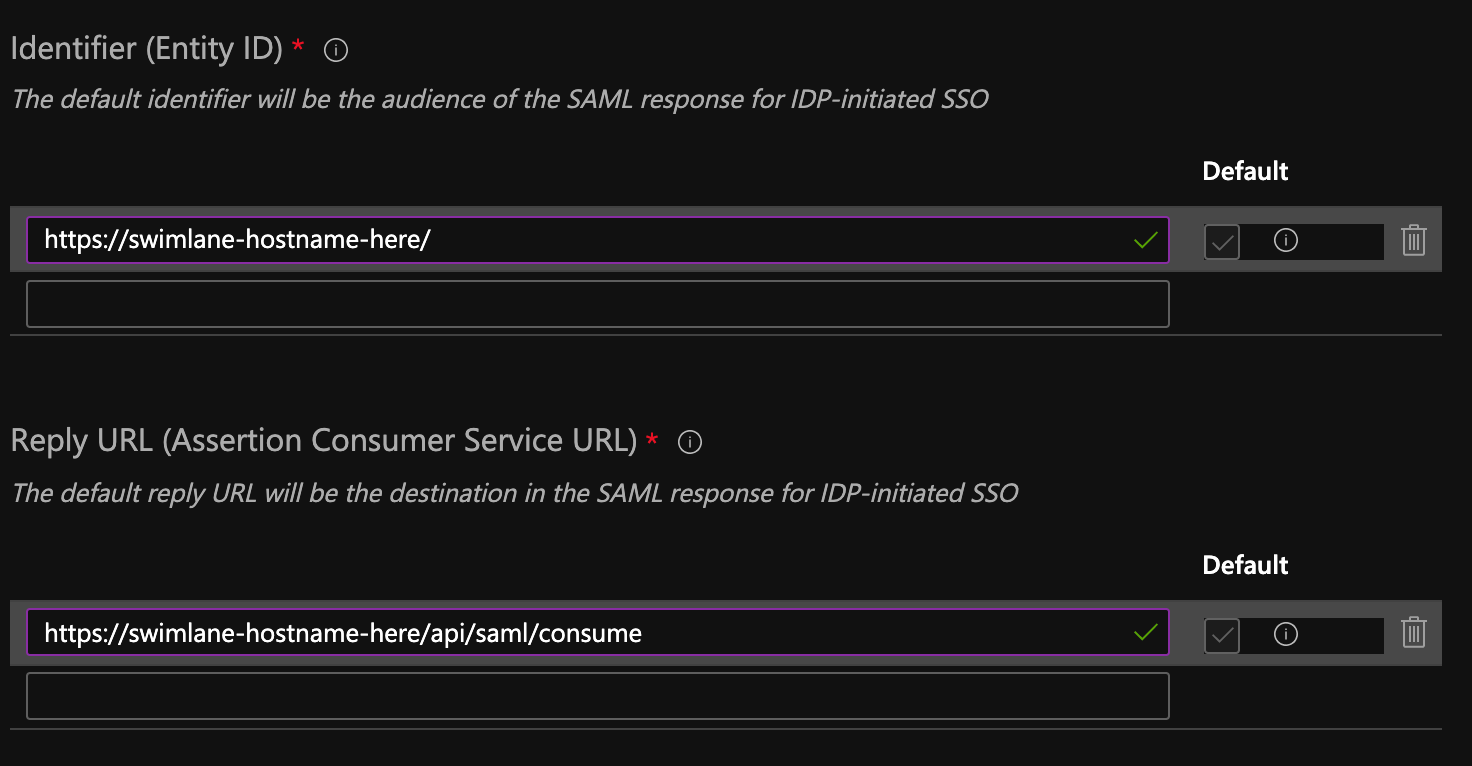
- In the SAML Signing Certificate section download the Certificate (Base64)
- With the information of the
Set up AppName section fill the Swimlane SAML Authentication dialog.
- Select Email Address in the Name ID Format field
- Login URL → SSO URL
- Azure AD Identifier → Identity Provider Entity ID
- Fill the Swimlane host name in the Service Provider Entity ID field
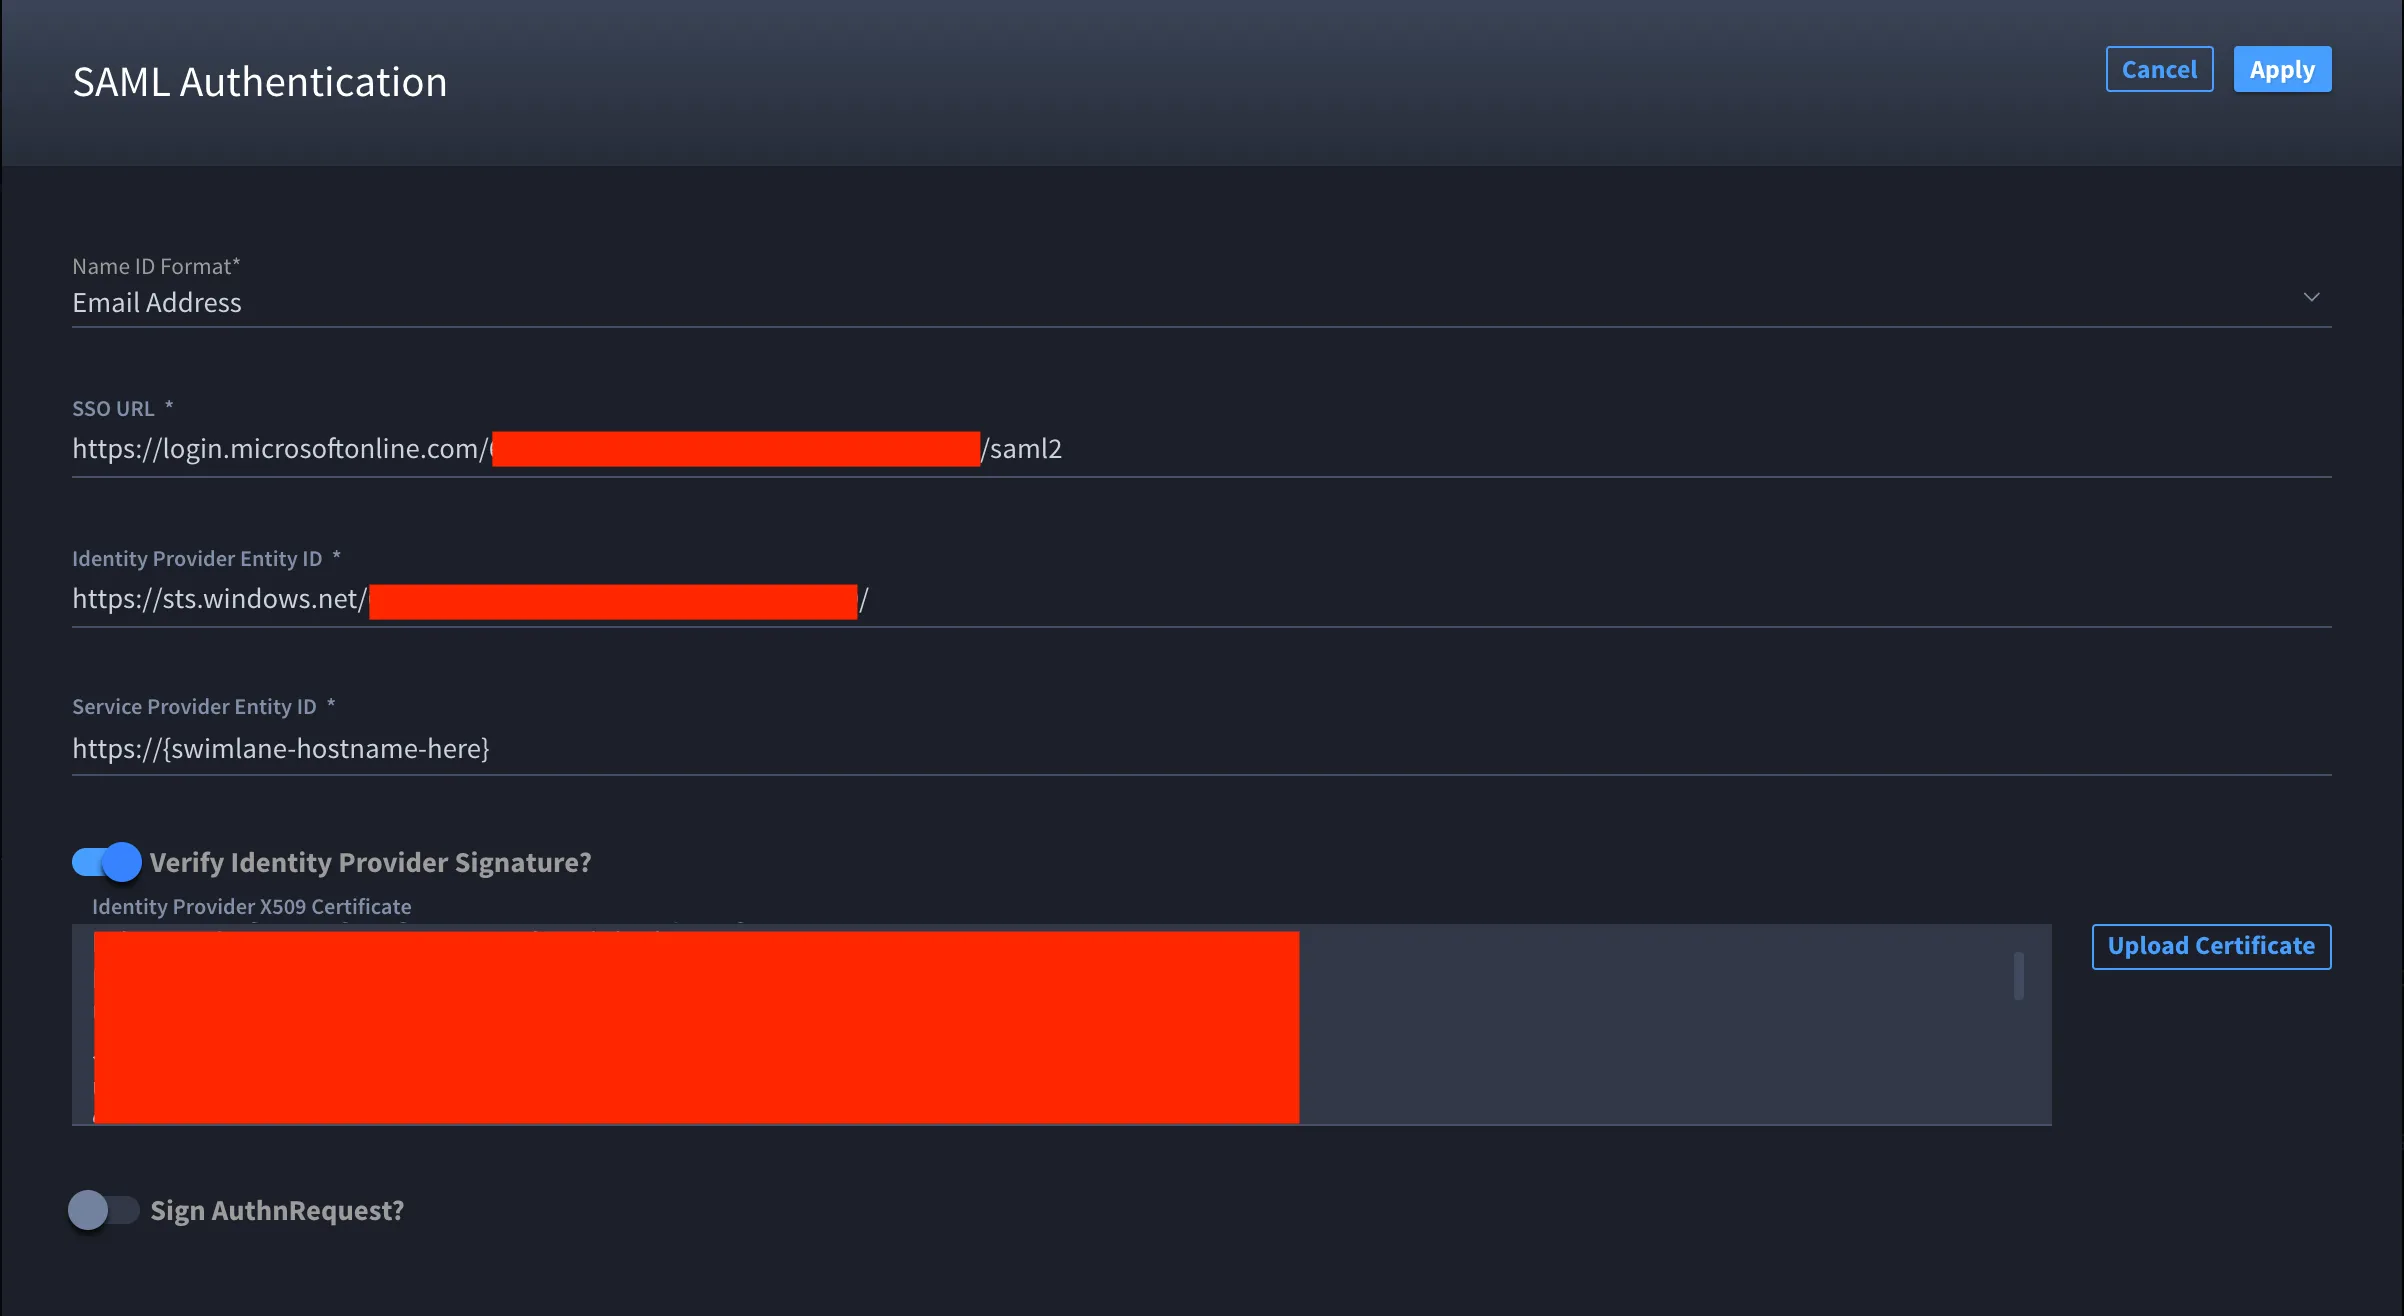
Rename the certificate extension to .cert and upload it → Identity Provider X509 Certificate
- Save the configuration and login by clicking
Login via SSO in the login page