Provisioning with SCIM Integration
Swimlane Turbine supports integration with System for Cross-domain Identity Management (SCIM) 2.0. This helps to streamline user management by automating onboarding and offboarding of users. Managing groups and the association of users to groups can be handled efficiently without manual intervention.
Swimlane Turbine supports SCIM 2.0 integration with both Okta SCIM/SSO Application Configuration and Azure SCIM Integration (Microsoft Entra).
With SCIM integration you can:
- Create a new user with group
- Create a new user without any group
- Retrieve a User by Id
- Create a new user without any group that exists in Swimlane Turbine
- Delete a user
- Disable User - delete the user in Turbine and not let them login to the application
- Activating a user in an IDP activates the user in Turbine
- Update user profile information to update in Swimlane Turbine
- Create a group with users
- Create a group without users
- Update a group
- Delete a group
Prerequisites for Configuring SCIM
- Supported IdP: Verify that your Identity Provider (IdP) supports SCIM integration.
- SCIM-Compatible Configuration: Ensure Swimlane is configured to support SCIM integration and provides the required SCIM endpoints.
- Network Configuration: Confirm that network settings allow communication between your IdP and Swimlane over HTTPS.
- Authentication Credentials: Obtain necessary credentials (for example, OAuth tokens, API keys) for secure communication.
Configuring SCIM
Provisioning a SCIM (System for Cross-domain Identity Management) application in an Identity Provider (IdP) involves configuring the IdP to communicate with the Service Provider (SP) using the SCIM protocol, ensuring efficient user identity management and automation.
See your IdP documentation for more information on provisioning SCIM in your IdP.
If you already have SAML and LDAP, you can still enable SCIM.
REST API Endpoints for SCIM
Following are the endpoints as part of the implementation on the tenant service (swimlane-tenant).
User endpoints:
- POST - /tenant/api/account/{ACCOUNT_ID}/scim/v2/Users
- GET - /tenant/api/account/{ACCOUNT_ID}/scim/v2/Users/{userId}
- DELETE - /tenant/api/account/{ACCOUNT_ID}//scim/v2/Users/{userId}
- PATCH - /tenant/api/account/{ACCOUNT_ID}/scim/v2/Users/{userId}
- PUT - /tenant/api/account/{ACCOUNT_ID}//scim/v2/Users/{userId}
Groups endpoints:
- POST - /tenant/api/account/{ACCOUNT_ID}/scim/v2/Groups
- GET - /tenant/api/account/{ACCOUNT_ID}/scim/v2/Groups/{groupId}
- PUT - /tenant/api/account/{ACCOUNT_ID}/scim/v2/Groups/{groupId}
- DELETE - /tenant/api/account/{ACCOUNT_ID}/scim/v2/Groups/{groupId}
- PATCH - /tenant/api/account/{ACCOUNT_ID}/scim/v2/Groups/{groupId}
User Endpoint Examples
Get - Accepts startIndex and count query param. By default items perPage should be 100. Accepts a filter query string like filter=userName eq "${email}"
Returns the list of users or empty array
Schema for empty Response:
Schema for Response with Users:
Get a Specific User - GET Users/userId
Response Schema for getting a user:
Create - Post
It accepts the user details from SCIM and returns the user with additional fields added by Swimlane.
Request Schema:
Response Schema:
If the user already exists then response should be returned in following schema:
Update - PUT /Users/$userID
Request schema to update the user:
Response should return the updated user.
PATCH - PATCH /Users/$userID
To activate/deactivate/password sync the user, Patch is used.
Example request schema for:
Response for patch should be updated user or 204.
DELETE - Delete is not directly supported from Okta. Patch is used for deprovisioning or deactivating the user.
Group Endpoint Examples
GET - /Groups - Accepts startIndex and count query param. By default items perPage should be 100
GET should accept query string filter = displayName eq "${groupName}"
Sample Request:
Response Schema if group exists:
Response schema if no group exists:
Get a specific group - /Groups/$groupID
Response schema:
POST - Request schema, Response should be group object same as Get.
Example:
PUT
PATCH - /Groups/$groupID
Patch is used to update the group object like name.
Request schema for PATCH to update group name:
Response for patch could be the updated group object or 204.
Users can be added by PATCH for OIN app.
Request schema :
Response should the updated group or 204.
DELETE - /Groups/$groupID Should return 204.
Authentication
The SCIM endpoint uses User PAT Token defined for the user at an account level.
The Base URL will include {AccountID} in the following format and will be used as identifier of the account for which users and groups are created /tenant/api/account/{ACCOUNT_ID}/scim/v2/.
Authorization
- User with Account Admin privilege should be able to access the endpoints
- Cross-account access is restricted
- All the roles assigned in Turbine for the users and groups will not be overwritten by the SCIM API Endpoint call
Field Mapping with Swimlane
SCIM | Swimlane |
|---|---|
userName | |
name.givenName | firstname |
name.familyName | lastname |
displayName | DisplayName |
groups | Groups |
active | disabled |
When provisioning from Azure, only userPrincipalName and displayName are required. If firstname, lastname, or email are not provided by Azure, Swimlane will automatically substitute them using the value from userPrincipalName.
Use-Case: Okta SCIM/SSO Application Configuration
Provisioning SCIM Application in Okta
- Log in to Okta as an administrator.
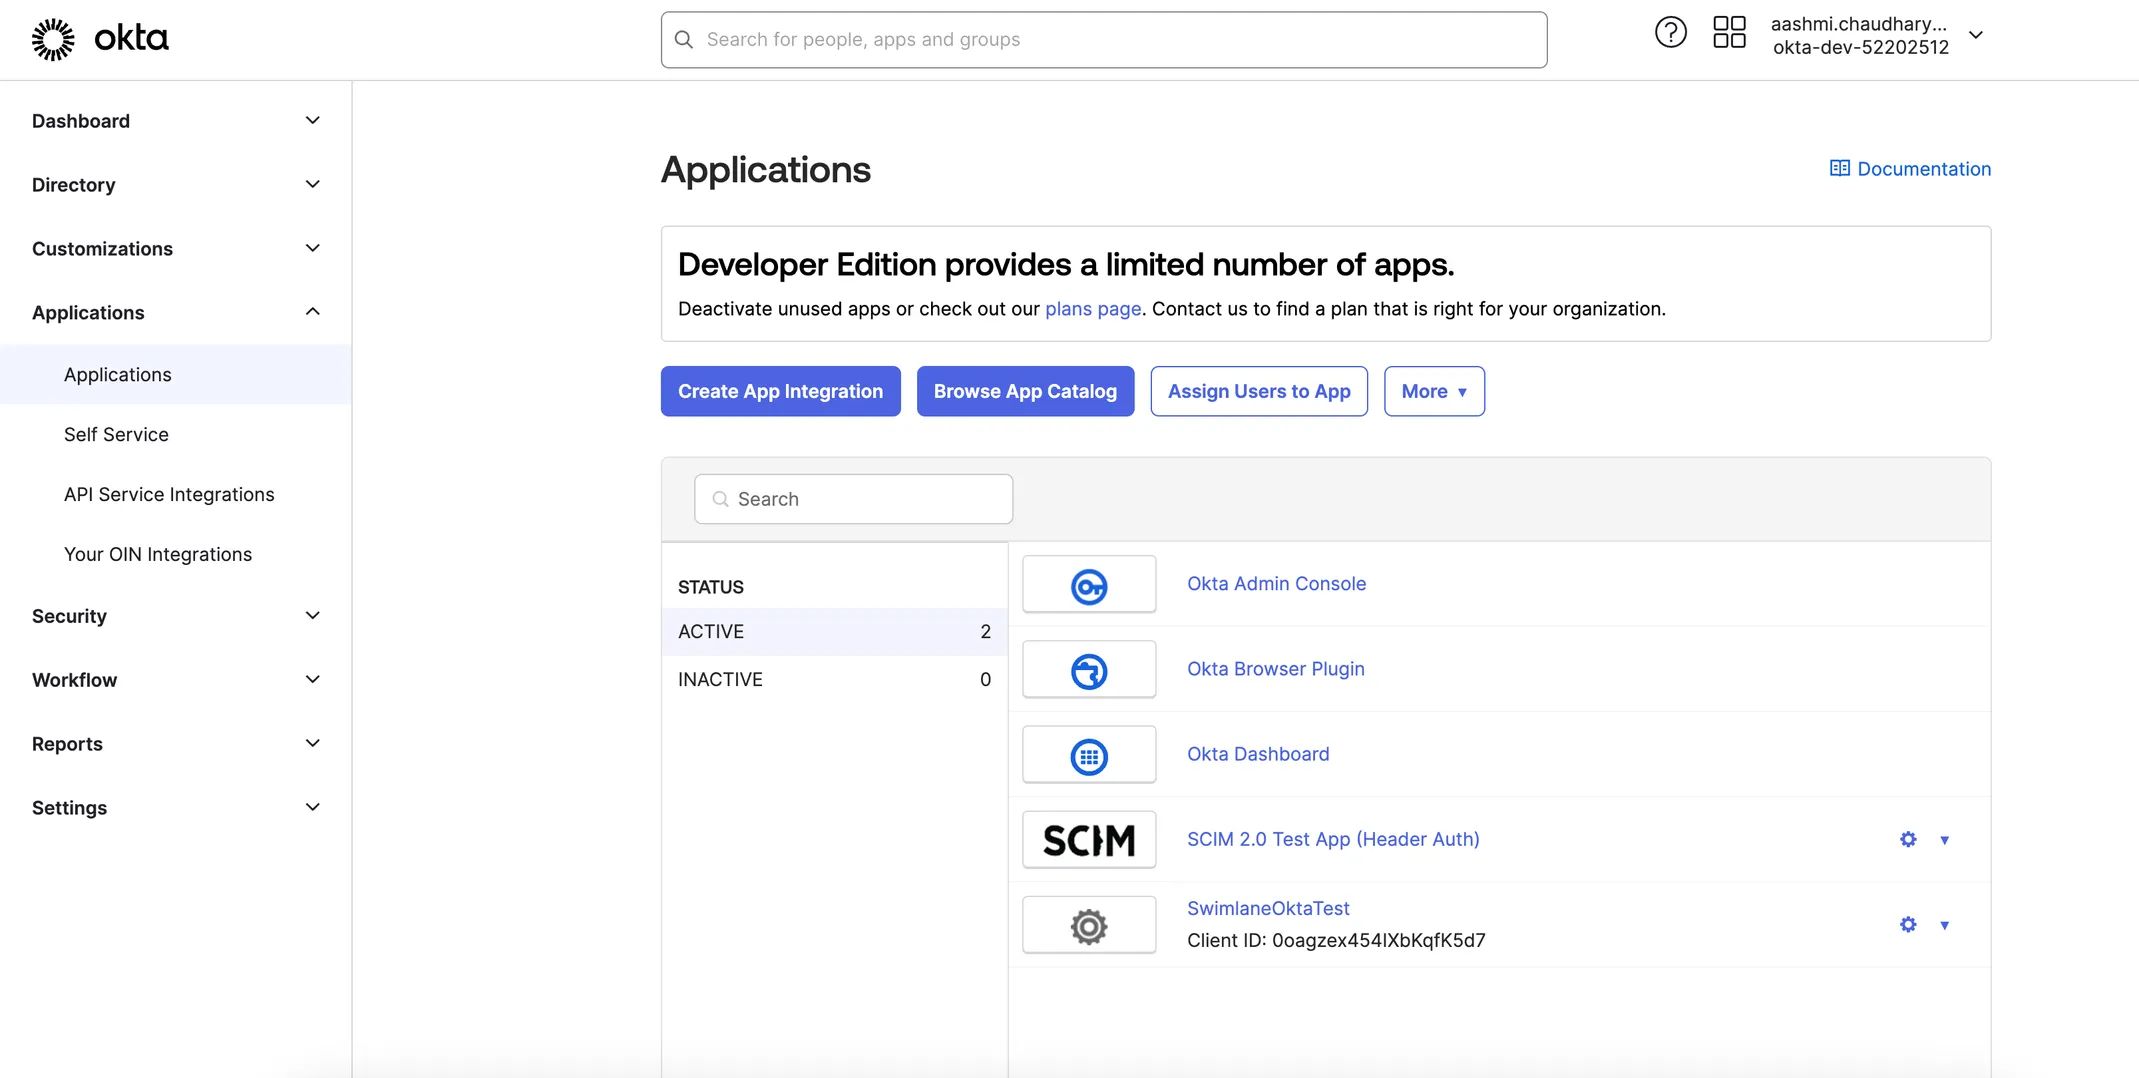
- On the left panel, select Applications > Applications, and click Browse App Catalog.
- Search for SCIM 2.0 App in the Search field.
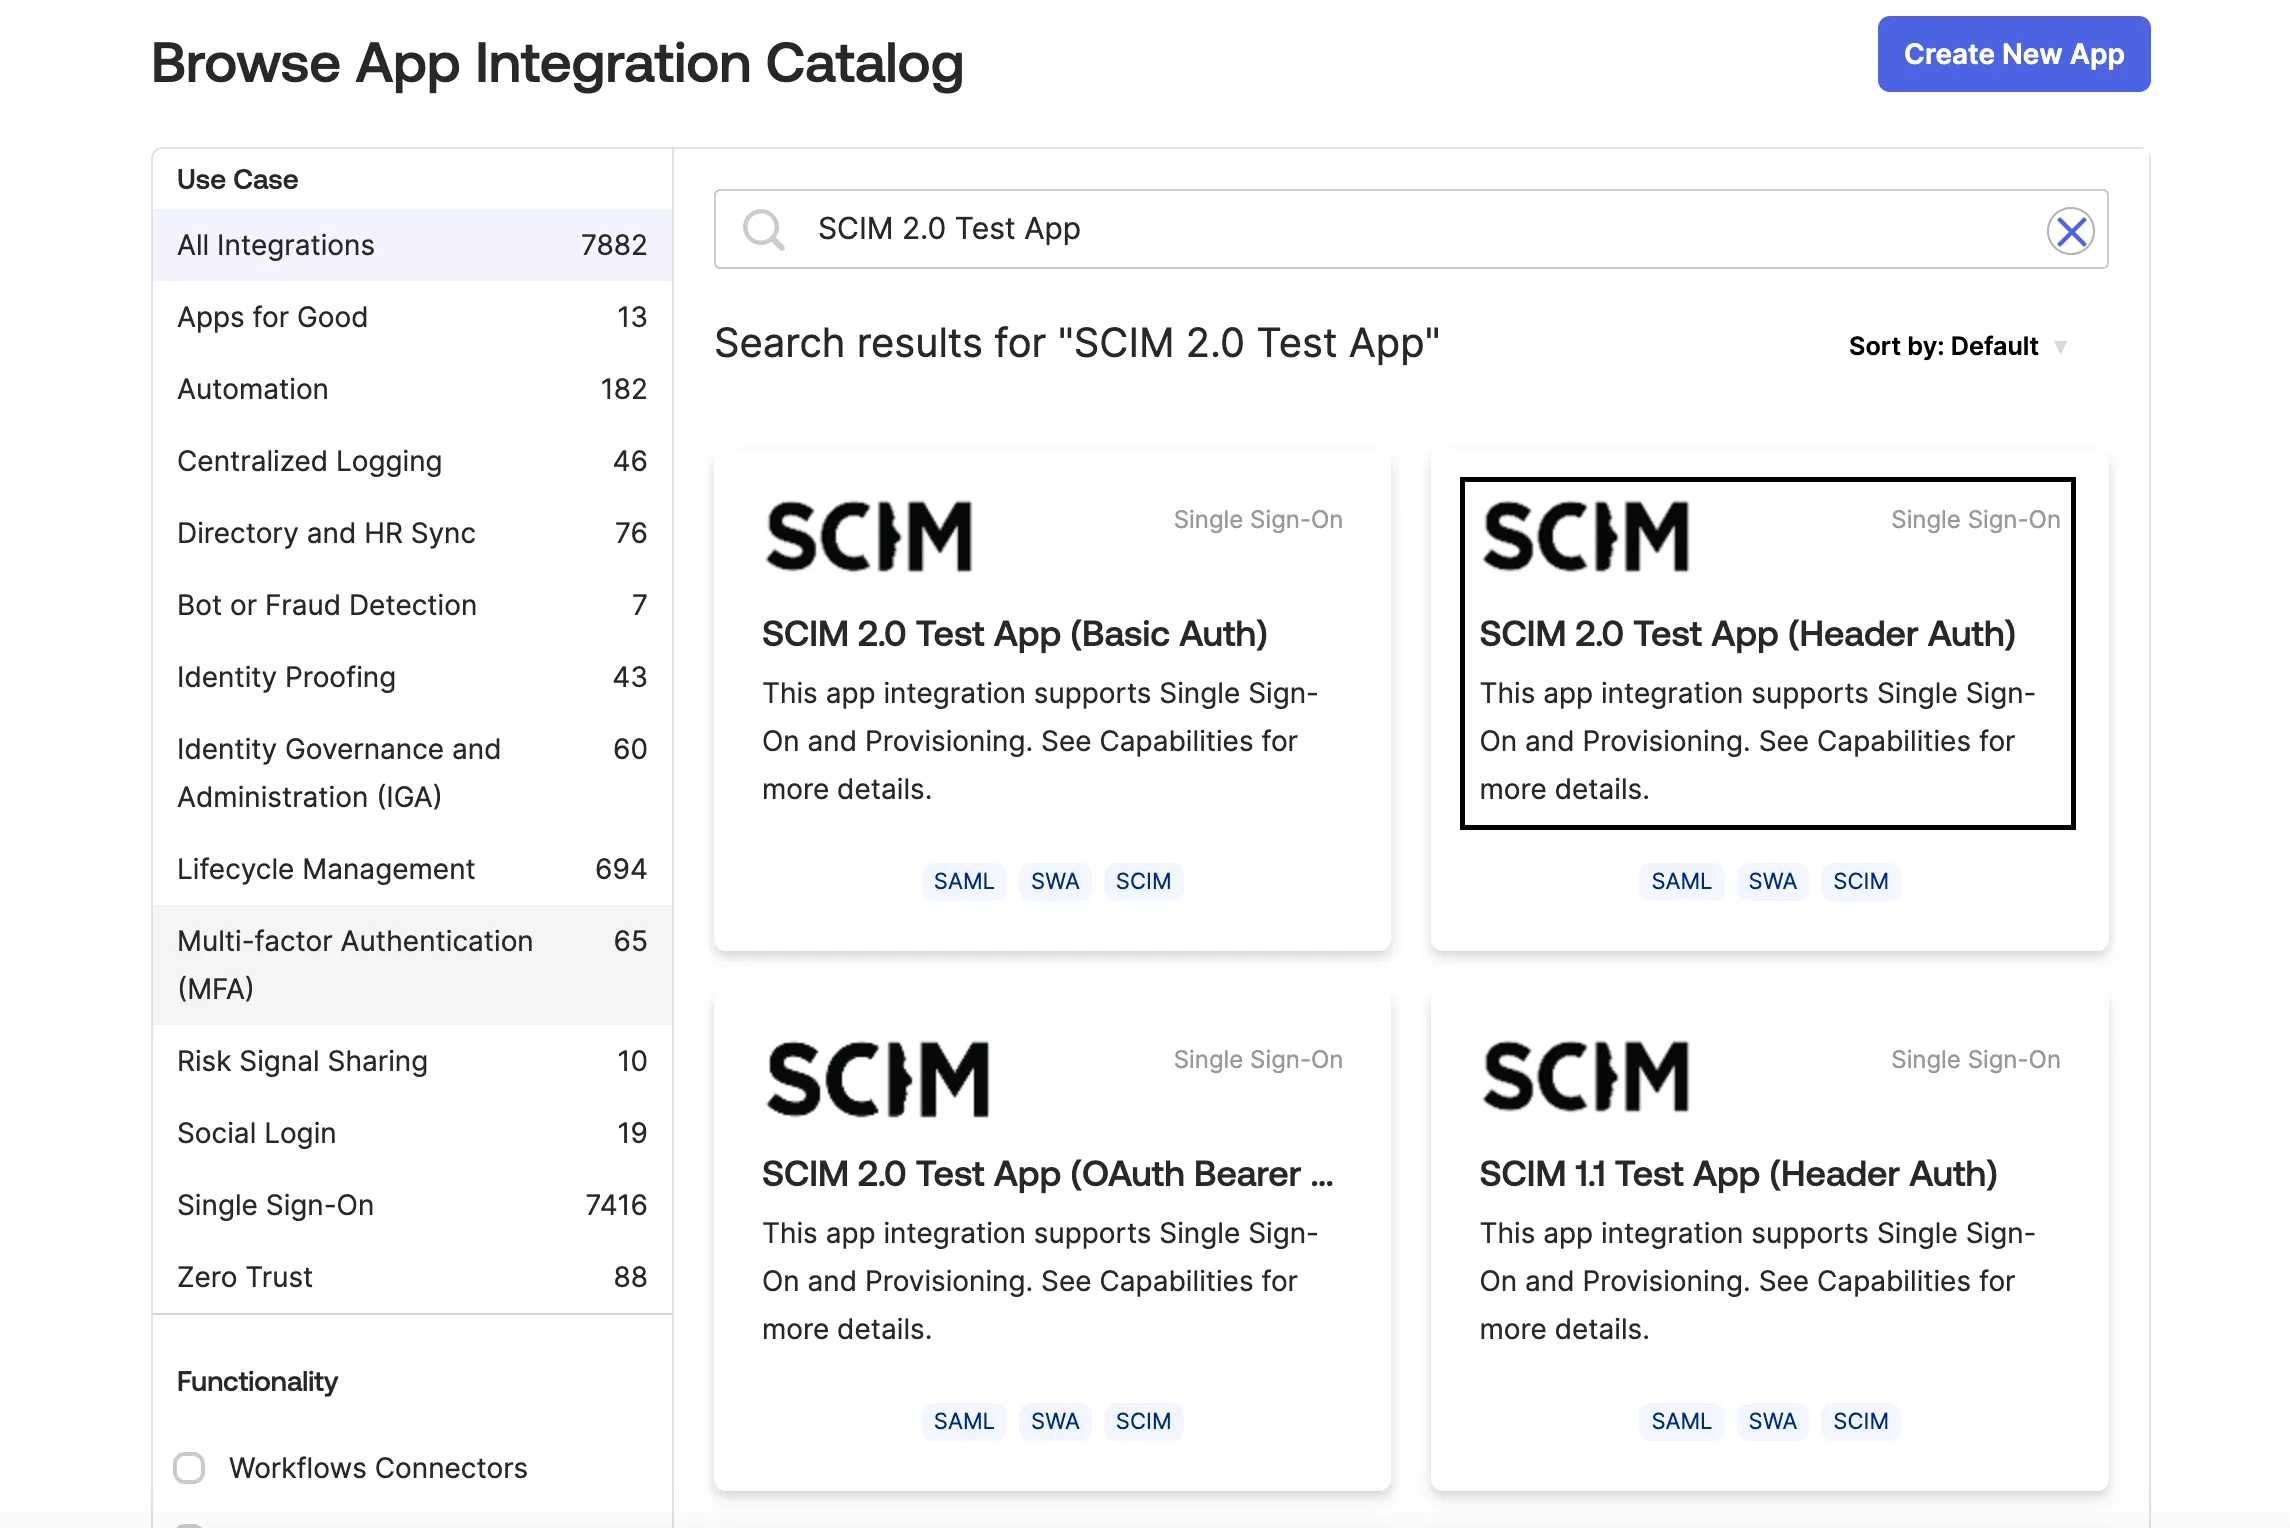
- Click on Add integration > Integrate the app.
- Click on Provisioning tab and Configure API Integration.
- Enter the base url {baseurl}/tenant/api/scim/v2 in Base URL and PAT in API token and click save.
Assigning Users
To provision Okta users in Swimlane Turbine, create users in Okta, assign the users to a group, and then assign the provisioning app to the group.
Create users in Okta:
- In Okta, on the left panel, select Directory > People, and click Add person.
- In the Add Person dialog box, enter the user details.
- Click Save or click Save and Add Another to add another user.
- From the Assignments tab, click Assign.
- From the pop up menu, click Assign to People.
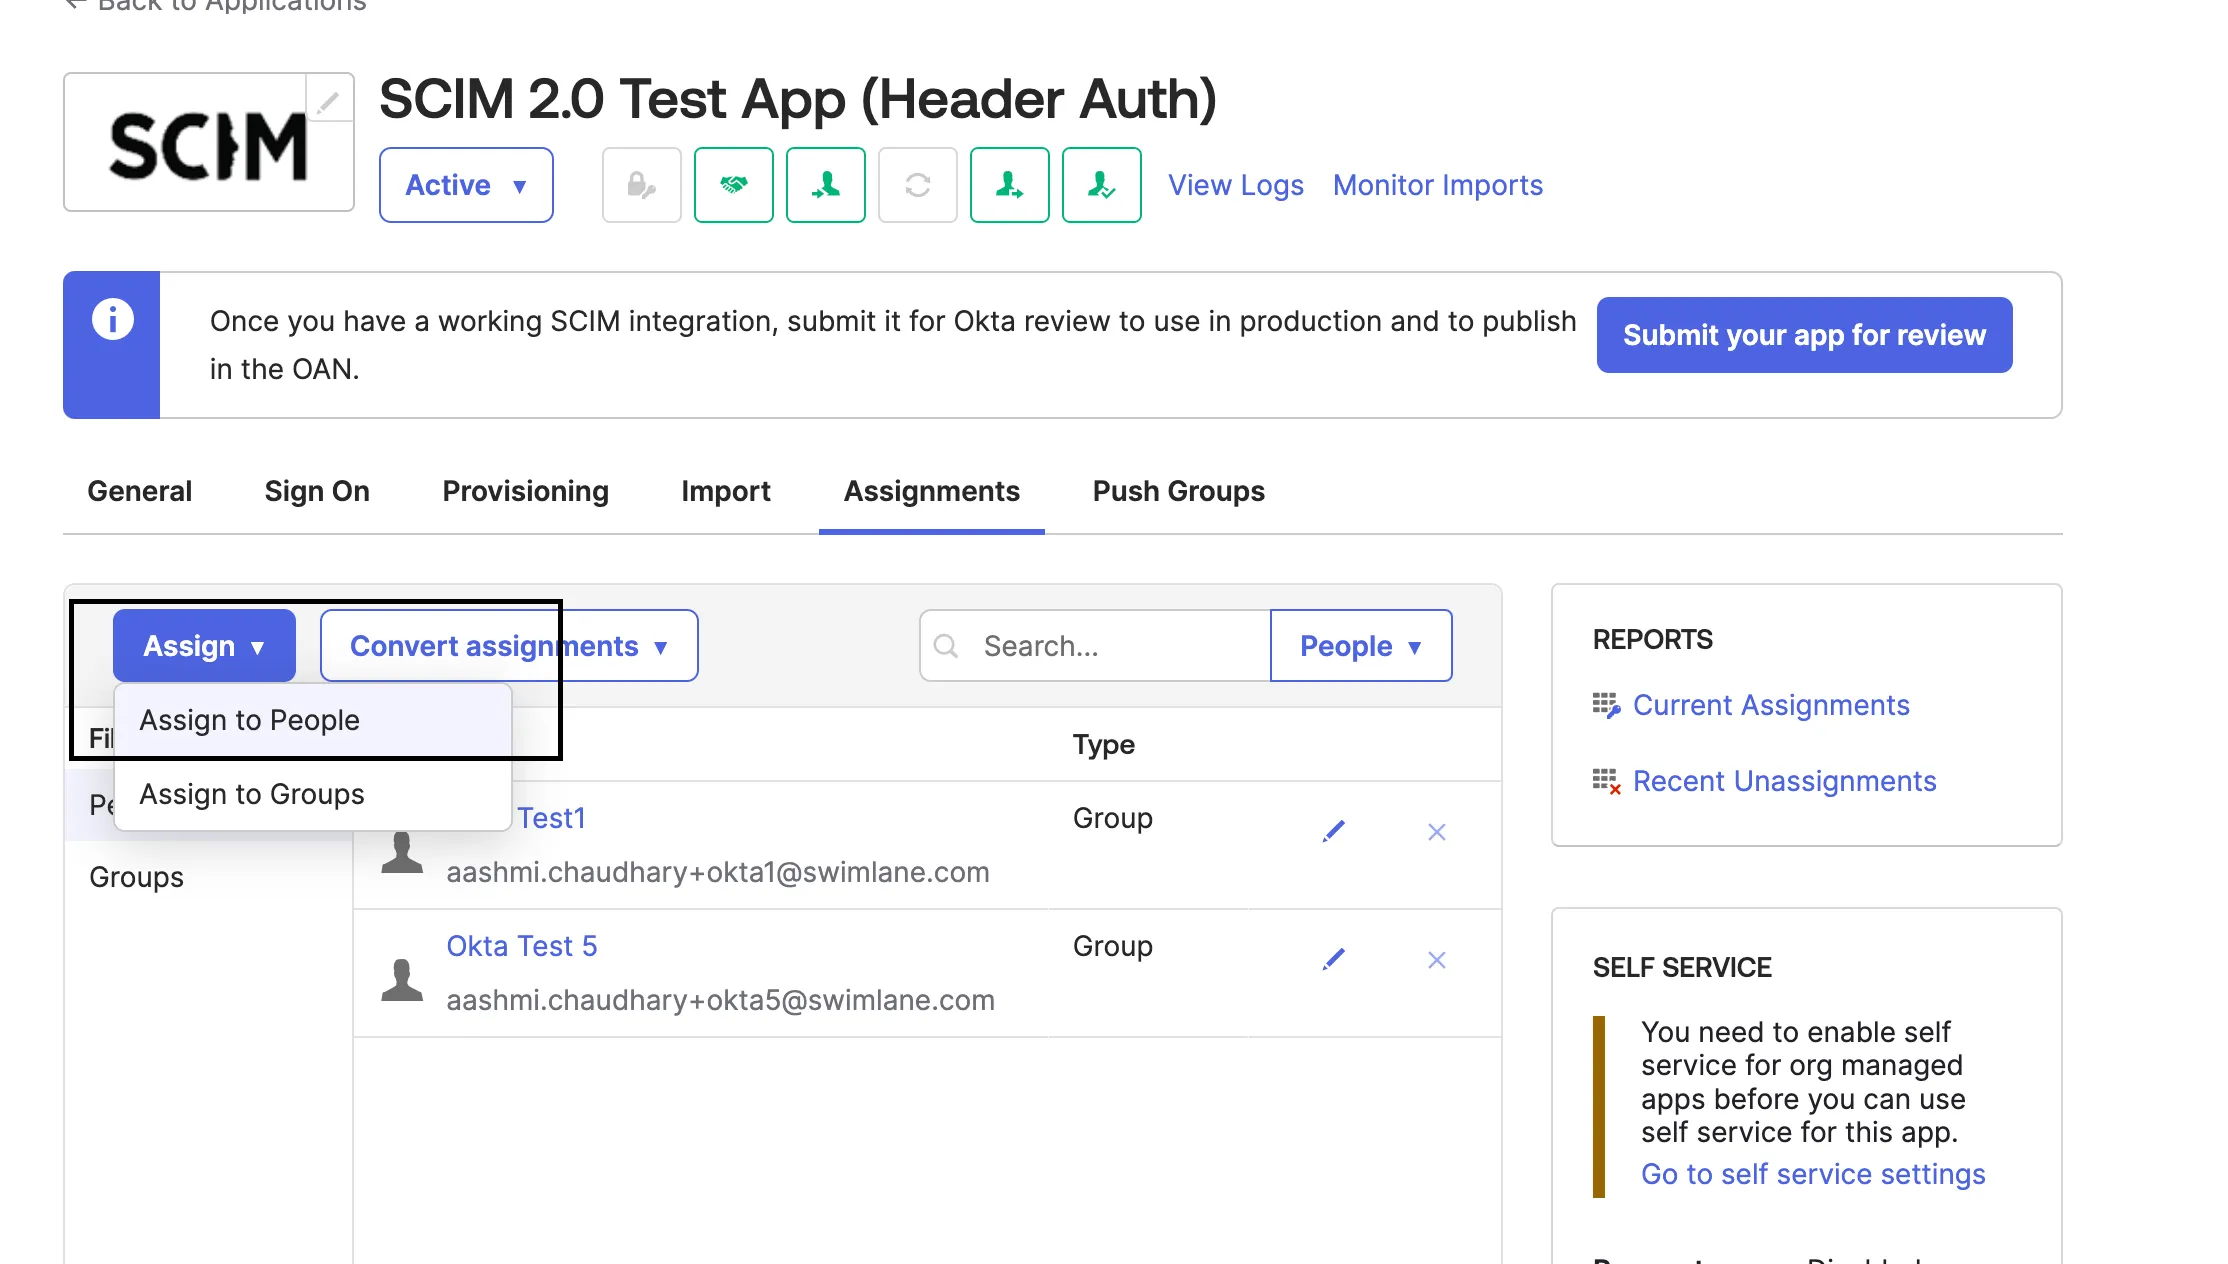
Assign any user and verify that the assigned user is added in Swimlane account. Note that Swimlane Turbine displays only few fields from the user fields. For example, see Field Mapping.
Editing or Removing Users
- From the Assignments tab, click on Assign.
- Click edit symbol next to the user.
- Update any user detail such as Mapped fields - givenName, familyName, display name, and so on and click Save.
- To delete a user, click delete icon next to the user and click Save.
Verify that user info is updated in Swimlane
Assigning Groups
If you do not already have your user groups set up in you IdP, you will need to create them. These will be the groups that you will later assign role and account access to in Swimlane. To learn how to create groups, see your IDP documentation.
Assigning users is done using two different tabs in the app. We recommend having your users selected on the Assignments tab and their associated groups selected on the Push groups tab.
- In the app, click on the Assignments tab.
- From the Assignments form, click on Assign.
- From the pop up menu, click on Assign to Groups.
- From the Assign to groups form, click on Assign for the group you wish to assign to the application.
- Click on Save and go back.
- Repeat the steps to add a group until all desired groups have been assigned to the application.
- Click Done.
Pushing Groups
- In the app, click on the Push Groups tab.
- From the Push Groups form, click on Push Groups.
- From the pop up menu, click on Find groups by name.
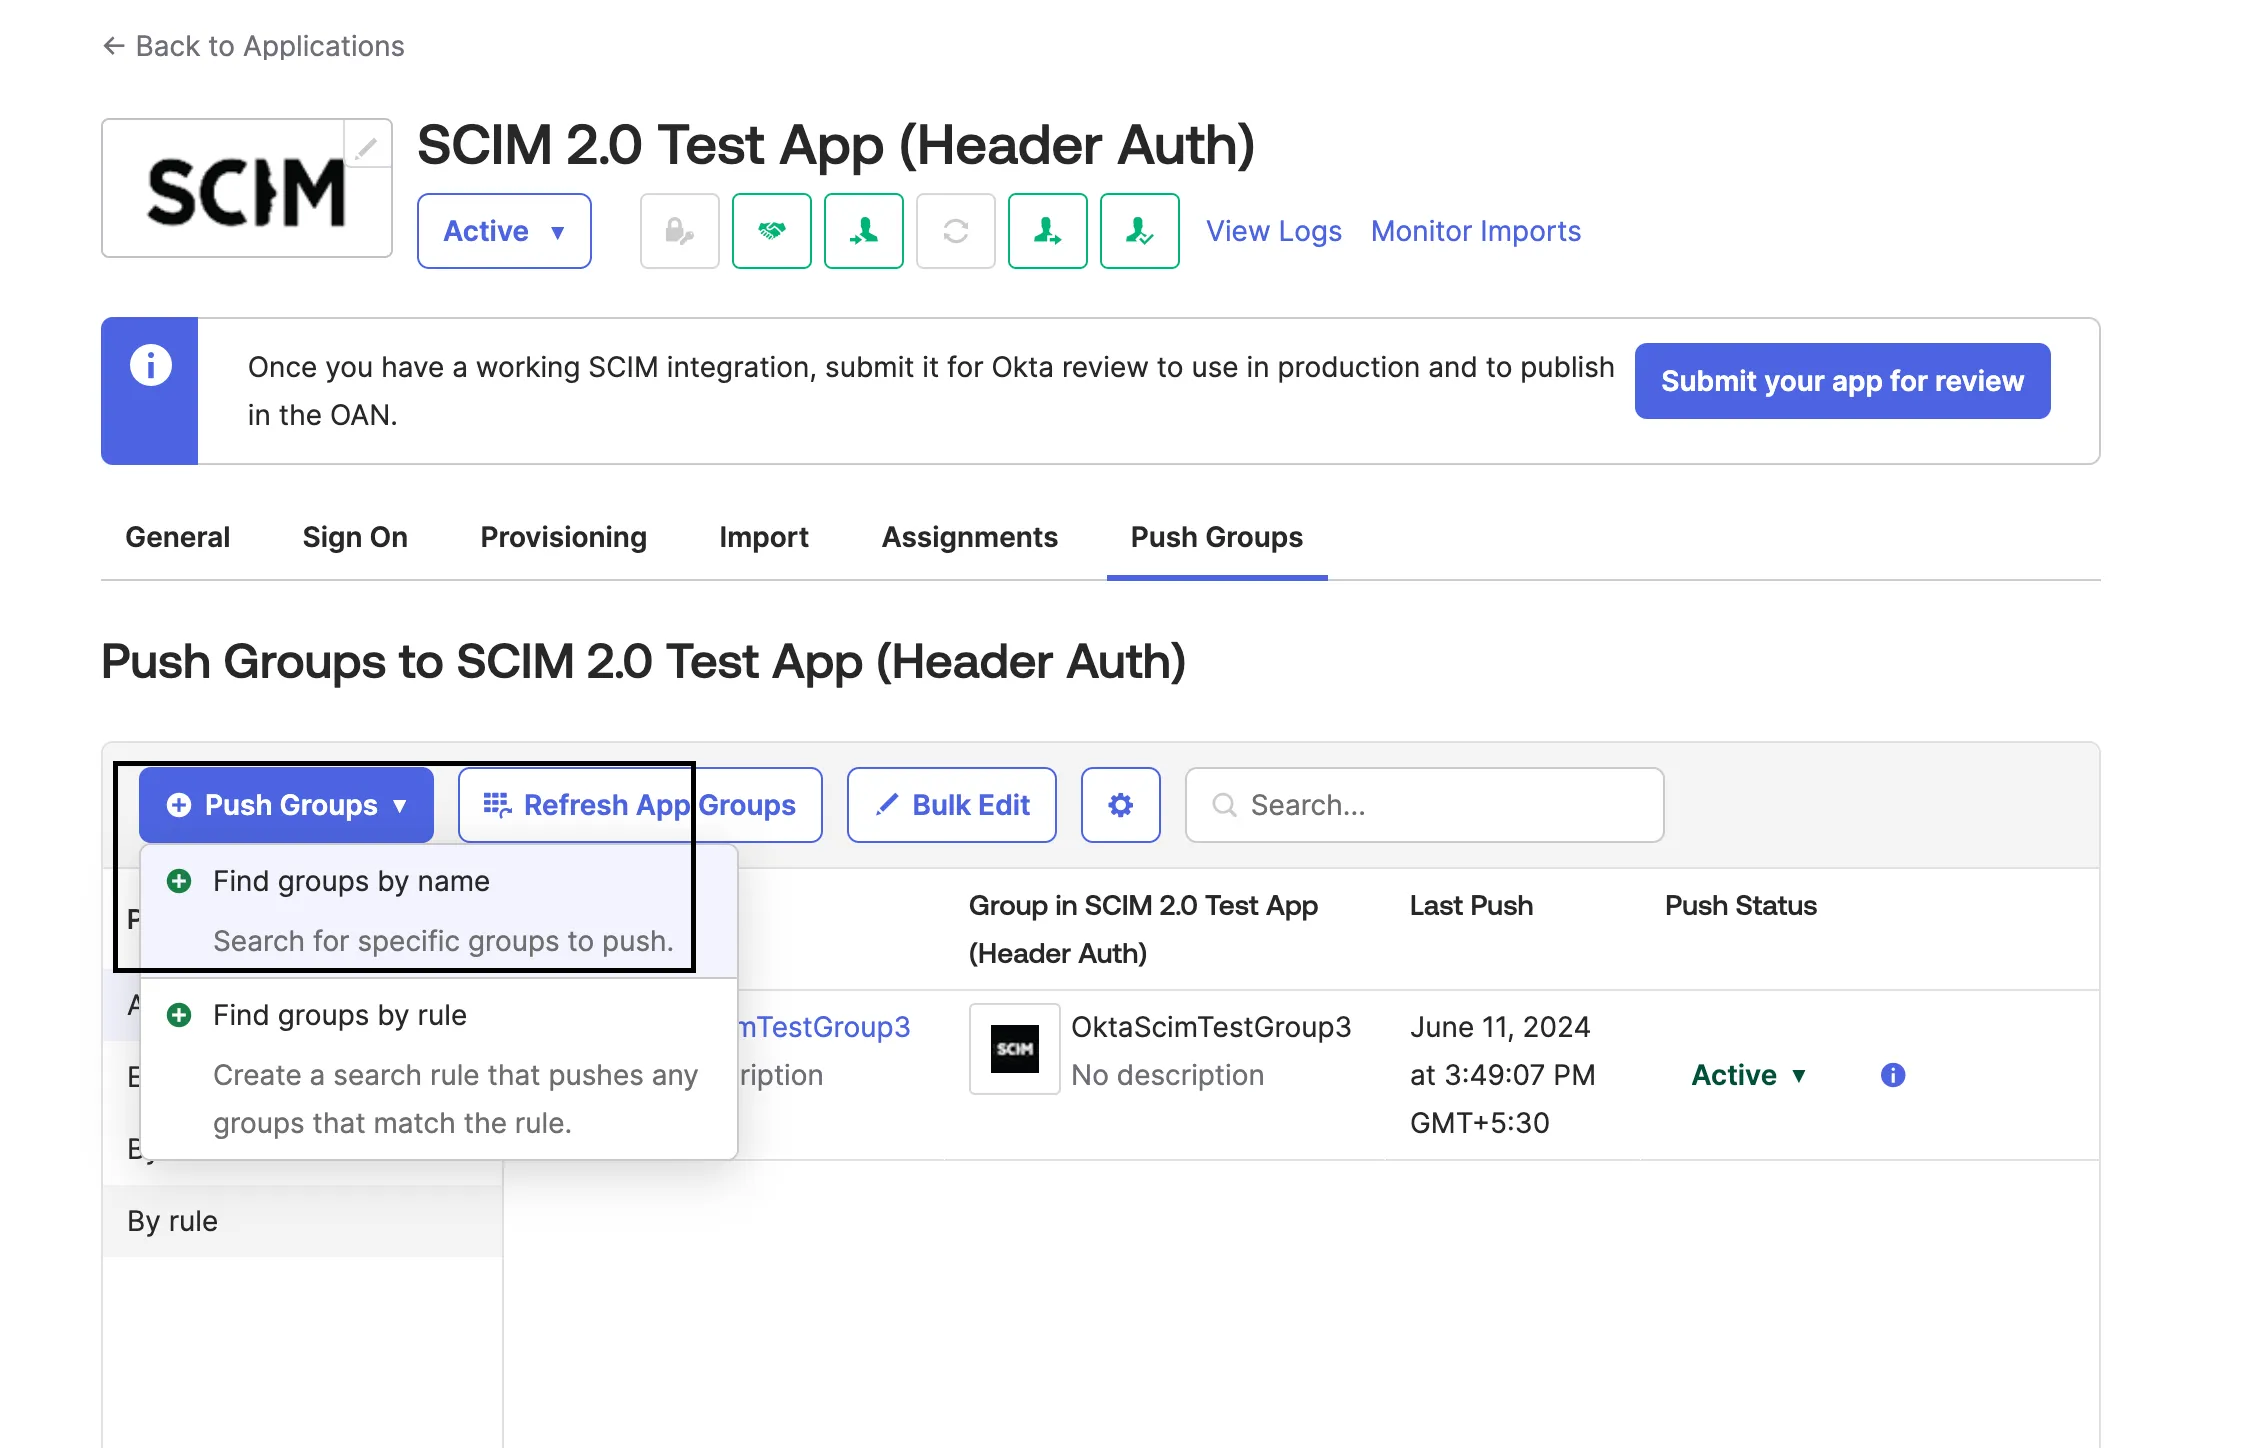
- From the Push groups by name form, in the search field enter the first few characters of the name of the group you want to send to Swimlane. Leave the Push group memberships immediately checkbox checked.
- Click on your group in the pop up search results list.
- If this is the last group you wish to send to Swimlane, click on Save. Otherwise, if you have more groups to configure, click on Save & add another and repeat the steps to add a group.
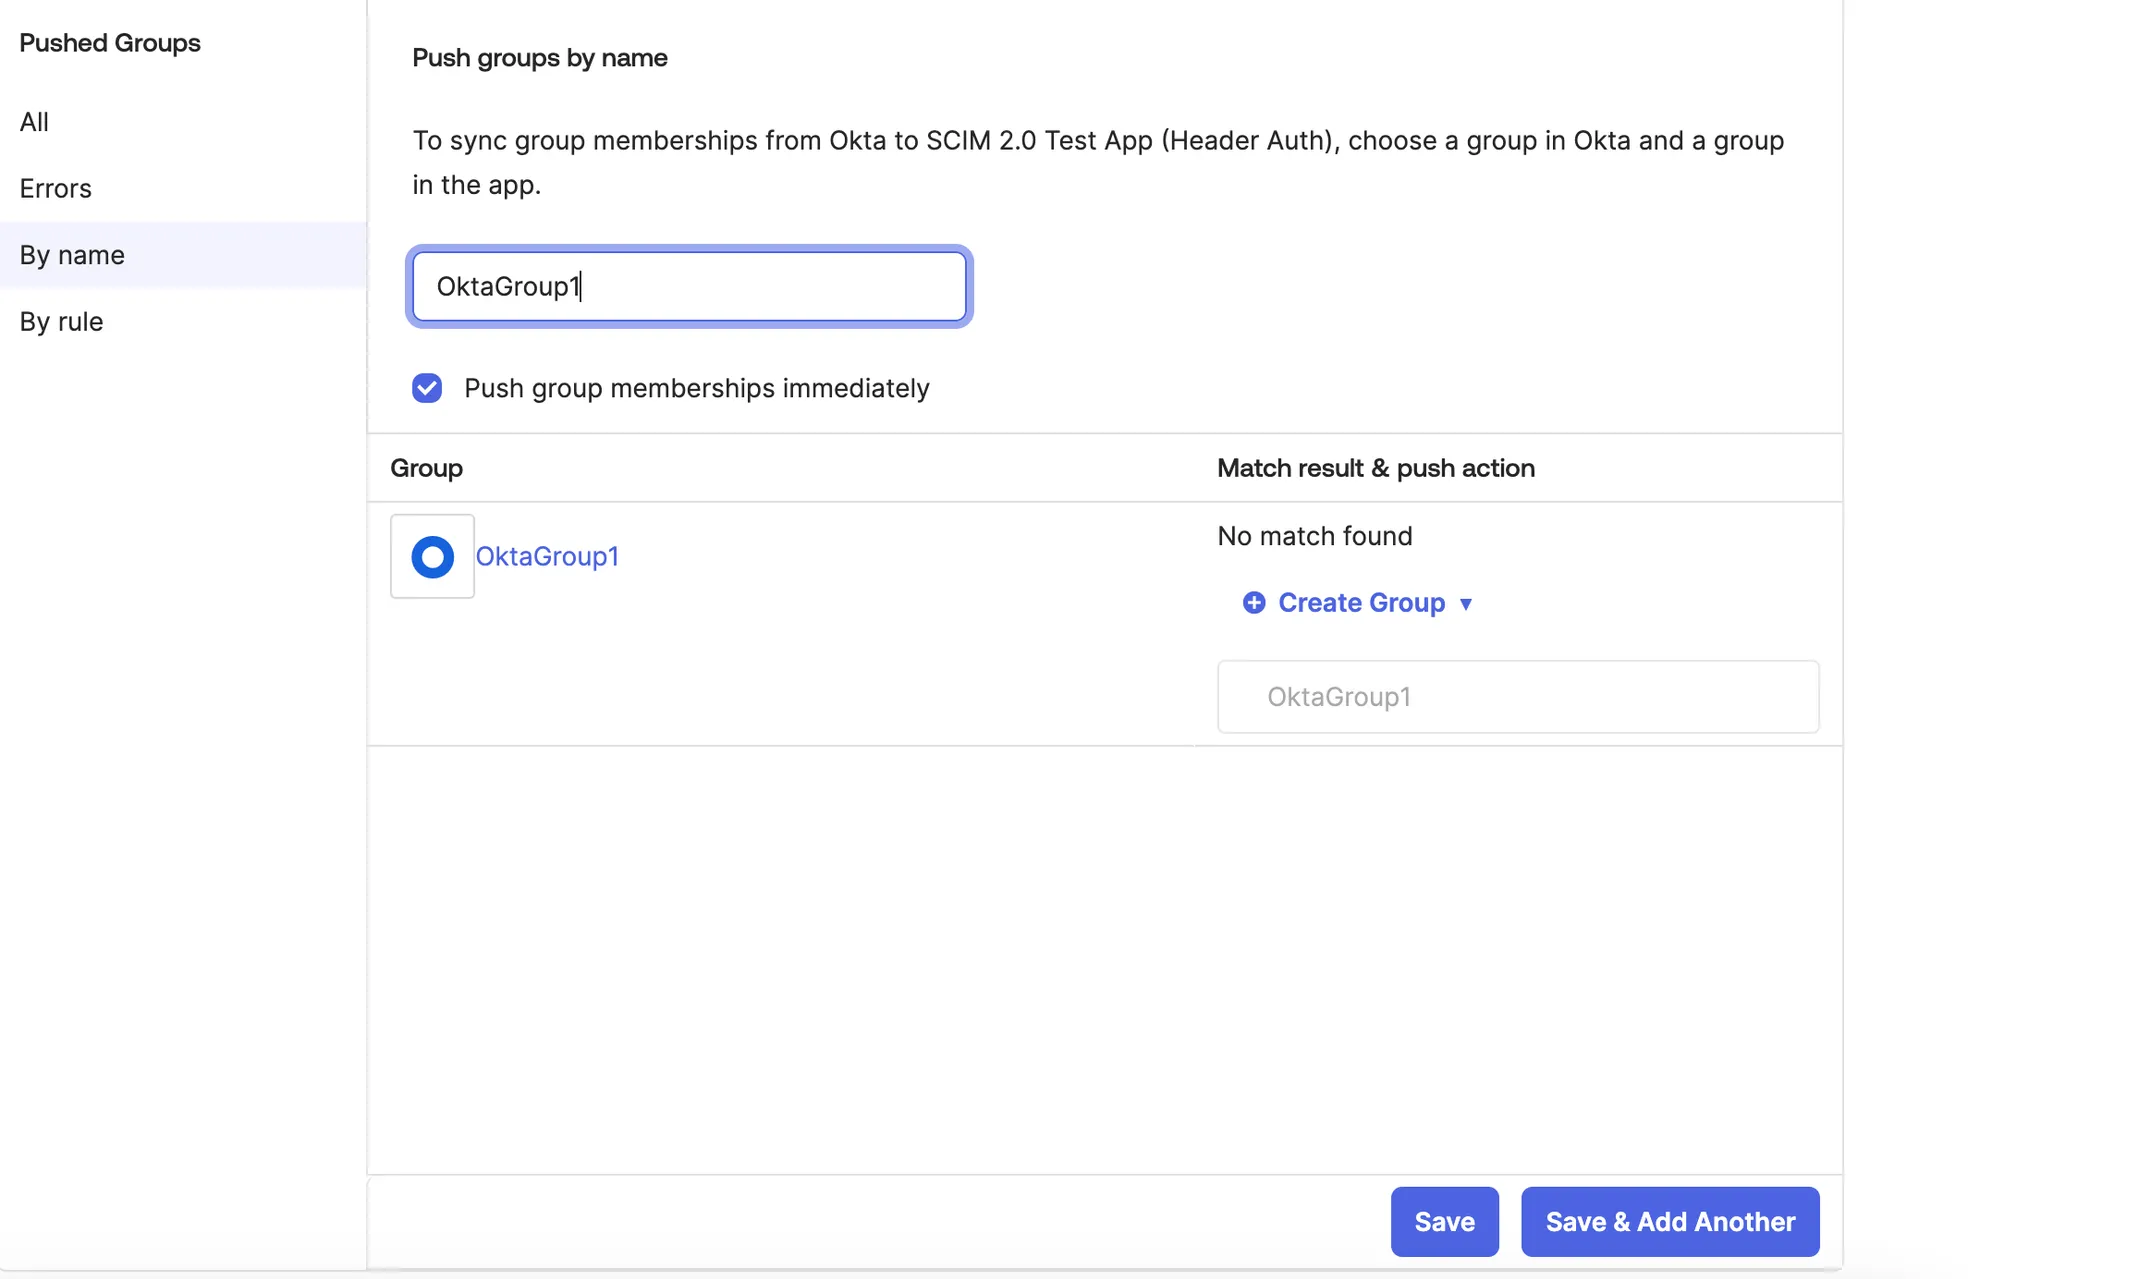
Without pushing the group, the group will not sync in Turbine. Once that is done that group will be syncing until it is deactivated in Okta.
Verify the group, group members, and user group association is added to Turbine.
Use-Case: Azure SCIM Integration (Microsoft Entra)
Swimlane Turbine supports SCIM 2.0 integration with Azure Active Directory (Microsoft Entra). This integration enables administrators to automatically provision users and groups to Swimlane using the SCIM standard.
High-level Configuration Steps
- In the Azure portal, create an Enterprise application and enable SCIM provisioning under the Provisioning tab.
- Set the Provisioning mode to Automatic.
- Enter your Swimlane Tenant URL and Secret token.
- To create a Secret token, see Get a Microsoft Entra token.
- Use Provision on demand to manually sync a user or group if needed.
- Assign users and groups under the Users and groups tab in the Azure application.
User Provisioning
Provisioning users from Microsoft Entra ID to Swimlane Turbine takes approximately 40 minutes. This interval is controlled by Microsoft and applies to all user-related operations, such as updating user details or removing user assignments. These changes are synced to Swimlane at the end of the next 40-minute cycle.
Group Provisioning
Provisioning groups, with or without users, typically takes 20 minutes to sync with Swimlane. This applies to changes such as:
- Adding or removing users from a group
- Updating group details
- Deleting groups or removing group assignments from the SCIM application
Understanding Provisioning Cycles
In the Overview tab of your Azure SCIM configuration, you can view provisioning cycle timestamps. The most relevant fields are Last cycle start time and Last cycle completed time. Any user- or group-related changes made after the Last cycle start time will be processed in the next provisioning run—approximately 40 minutes later for users and 20 minutes later for groups.
Immediate Provisioning (Provision on demand)
To sync a user or group immediately, use the Provision on demand feature available in the left navigation pane of the Azure SCIM configuration. This triggers an instant provisioning attempt for the selected user or group. Keep the following in mind:
- Provision on demand only supports provisioning; it does not support updates, deletions, or group membership changes.
- When provisioning groups, you can select individual users rather than syncing the entire group.
Attribute Handling
Azure requires only the userPrincipalName and displayName attributes. Swimlane expects additional attributes, including firstName, lastName, email, and displayName. If any required attribute is missing, Swimlane uses the userPrincipalName value as a fallback.
For more information, see How SCIM provisioning works in Azure AD on Microsoft Learn.