General
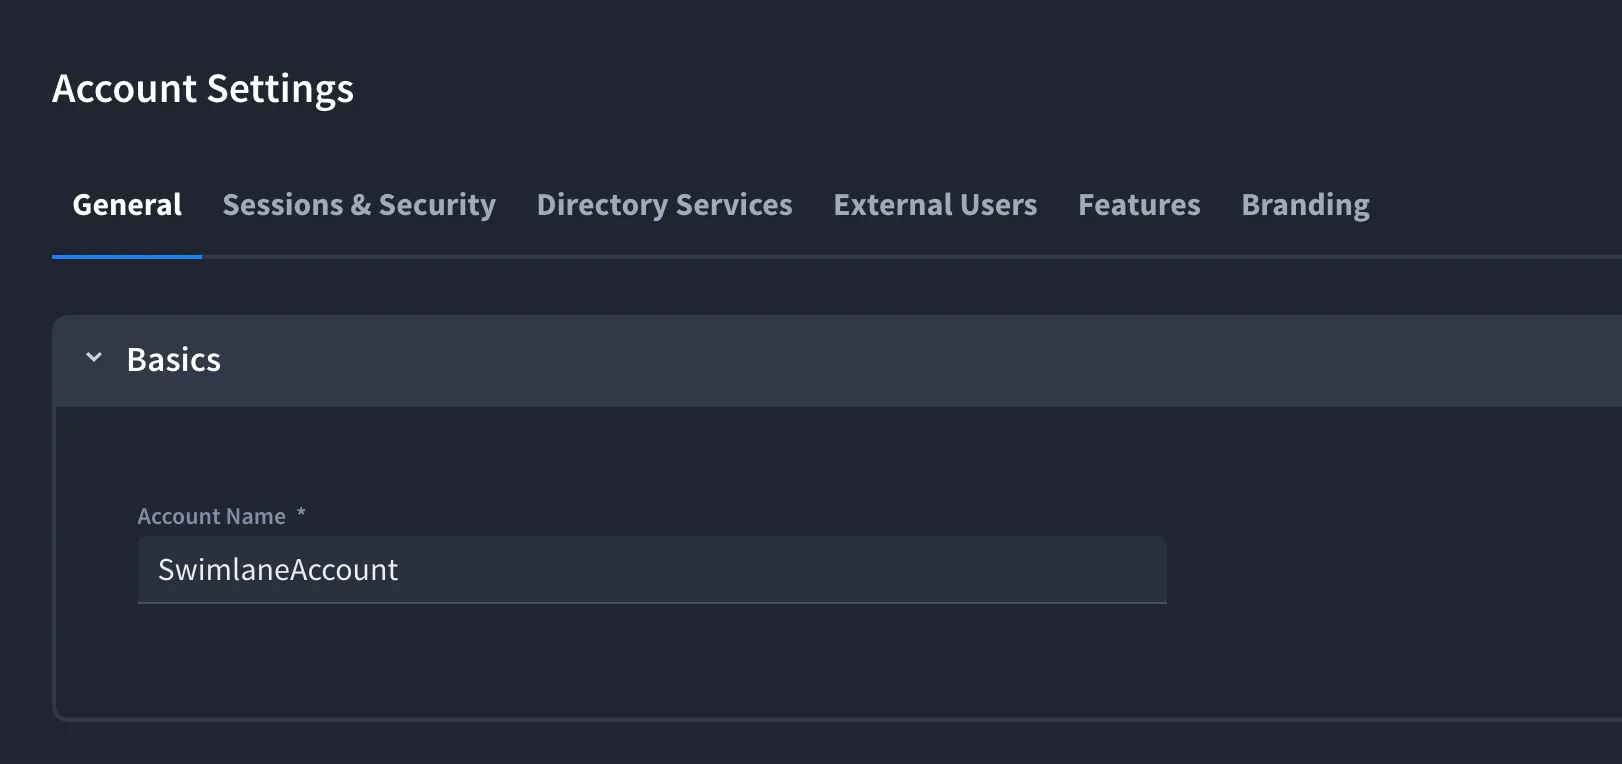
The General tab allows you to edit your Account Name and Domain provided during the creation of the account. These settings are essential for identifying your organization within Swimlane Turbine and may be used in various integrations and authentications.
Note: The General settings are only available to Turbine administrators. Changes to the Account Name or Domain fields can affect integrations and authentication configurations. Ensure you have verified the changes before saving.
Steps to Edit the Account Name
Follow these steps to edit the Account Name and Domain:
- Click on your profile in the top-right corner and select Admin Panel from the dropdown menu.
- From the left navigation menu, select Settings > Account > General.
- Click > to expand the Basics section.
- Input your new account name in the Account Name field.
- Click Save to apply the changes.
Custom Domain
A custom domain is a personalized web address that a company owns and controls — for example, instead of using a generic URL provided by Swimlane, you have the flexibility to customize it to better align with your branding, address your customers' needs, and mitigate any security concerns you may have.
Example:
Instead of using region.swimlane.app, a cybersecurity automation company could set up swimlane.<yourcompany>.com.
Requirements and Considerations for Adding a Custom Domain in Swimlane
Before you configure a custom domain in Swimlane, check the following prerequisites and important notes:
- Administrator Access Required: Only users with Account Admin permissions can configure a custom domain.
- Access to DNS Records: Custom domains require updates to your DNS records. This setup typically involves coordination with your IT team or network administrator to ensure proper DNS configuration.
- Domain Format for Security: To maintain platform security and protect against man-in-the-middle (MITM) attacks, Swimlane requires custom domains to follow this structure: <subdomain>.<subdomain>.<domain>
Enable Custom Domain
Step 1: Add a custom domain
- Navigate to Settings -> Account Settings -> General.
- The basic/default domain is enabled automatically.
- To add a custom domain click +Add.
- In the first page Add Custom Domain page, enter the valid domain name in the Domain field in the valid domain pattern.
Note: The character limit is 62 characters.
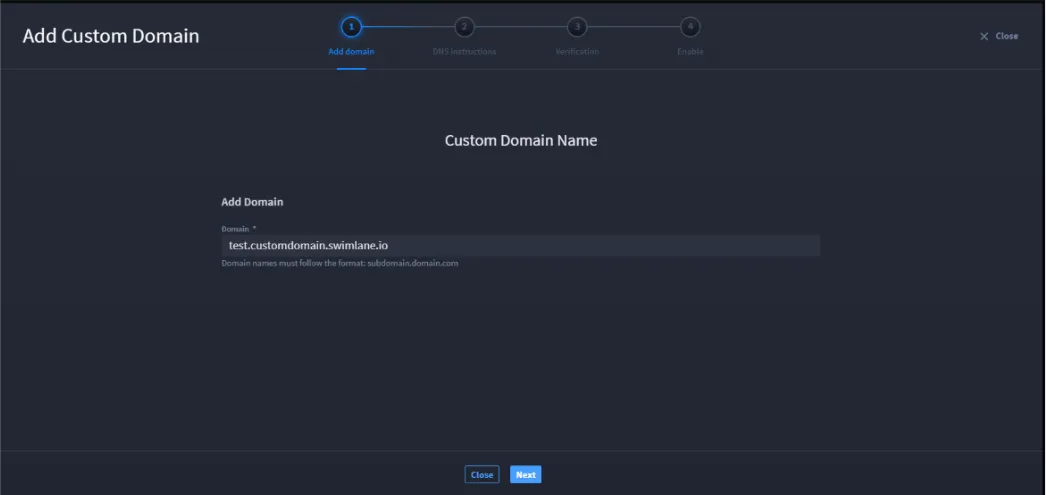
If the domain name is valid, then the NEXT button is enabled and you can move to the DNS Instructions step.
Step 2: Update the DNS Provider
To update the DNS records:
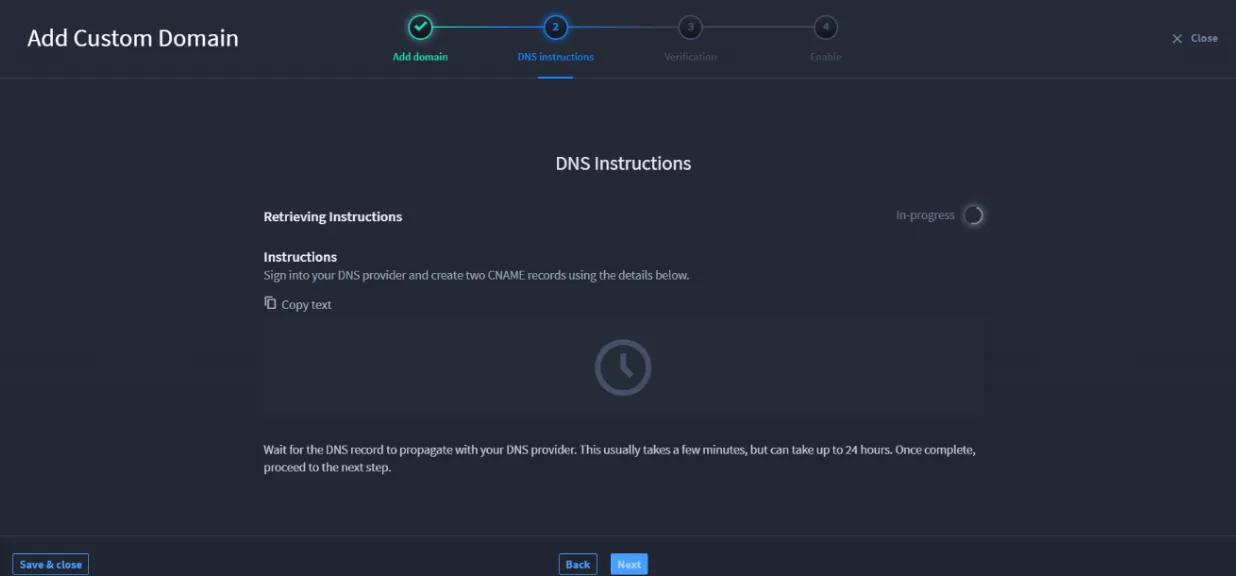
Copy the automatically displayed Retrieve instructions to configure your DNS setup.
Access Your DNS Provider
- Log in to your DNS provider and navigate to the settings
- Add 2 new CNAME records
- Create CNAME Records
- Record Type: Select CNAME.
- Host/Name: This will usually be the subdomain you are configuring, like www or something like verify.
- Value :Enter the value provided on the screen you saw (it is not shown in your screenshot but would be displayed once retrieval completes).
- TTL (Time to Live): Set to default or choose a low TTL like 5 minutes to speed up propagation (not mandatory).
- Save the changes, and wait for them to propagate. This can take a few hours depending on the DNS provider and TTL settings.
Step 3: Verify and Prepare to Enable Your Domain
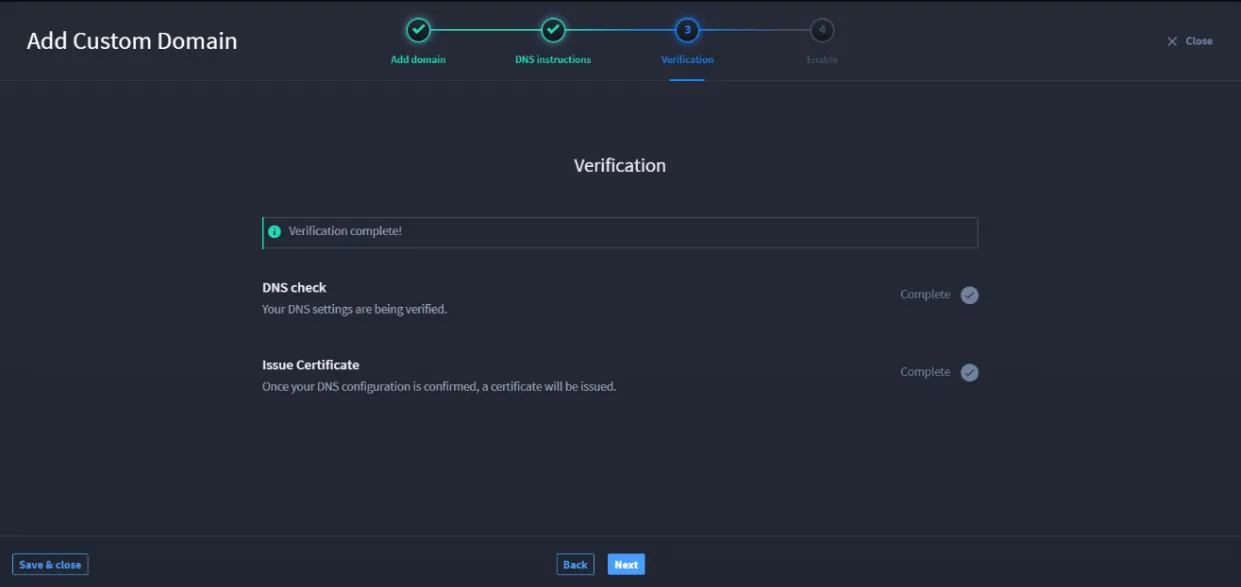
Once the status of your domain shows Verification Complete and both checks (DNS Check and Issue Certificate) are marked as Complete, once validated and obtained the certificate.
To proceed with activation:
- Follow the custom domain setup wizard to Step 4 (Enable).
- Activate the custom domain for your Swimlane instance.
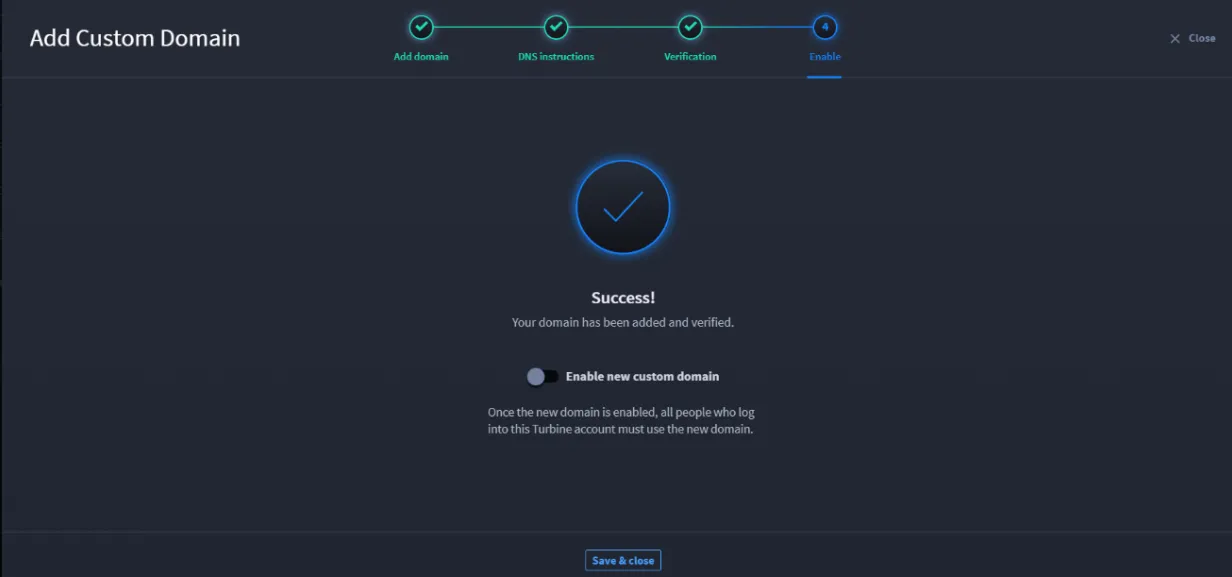
Step 4: Enable and Finalize Custom Domain Setup
Now that your custom domain has been successfully added and verified. All configuration steps—including adding the domain, setting up DNS records, and issuing the SSL certificate are completed.
To activate the new domain, enable the Enable new custom domain toggle. Once enabled, all users will be required to access the platform using the new domain.
Click Save & close to finalize the setup and apply the changes.
The original Swimlane URL (fallback URL) will still be functional.
However, when users access it, they will be redirected back to the custom domain for a consistent and branded experience.
Disable the Custom Domain
To disable the custom domain, click Disable.
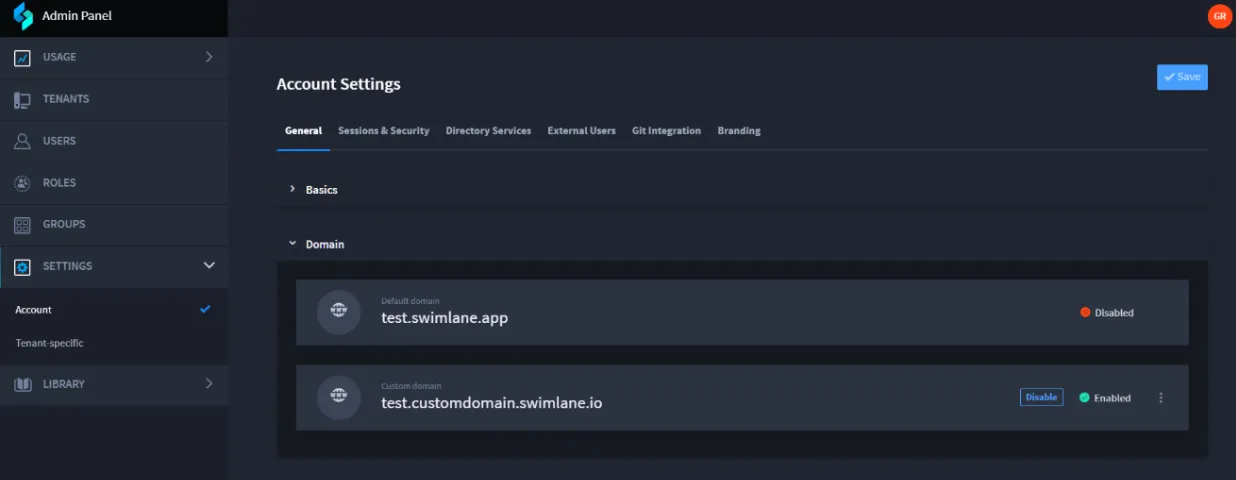
If you click Disable on the custom domain:
- The system will deactivate the test.customdomain.swimlane.io.
- All access will be redirected back to the default Swimlane domain test.swimlane.app.
- Any saved bookmarks, email links, or integrations using the custom domain will no longer work unless updated.
Delete the Custom Domain
Click the three vertical dots (⋮) next to the custom domain, then select Delete from the dropdown menu.
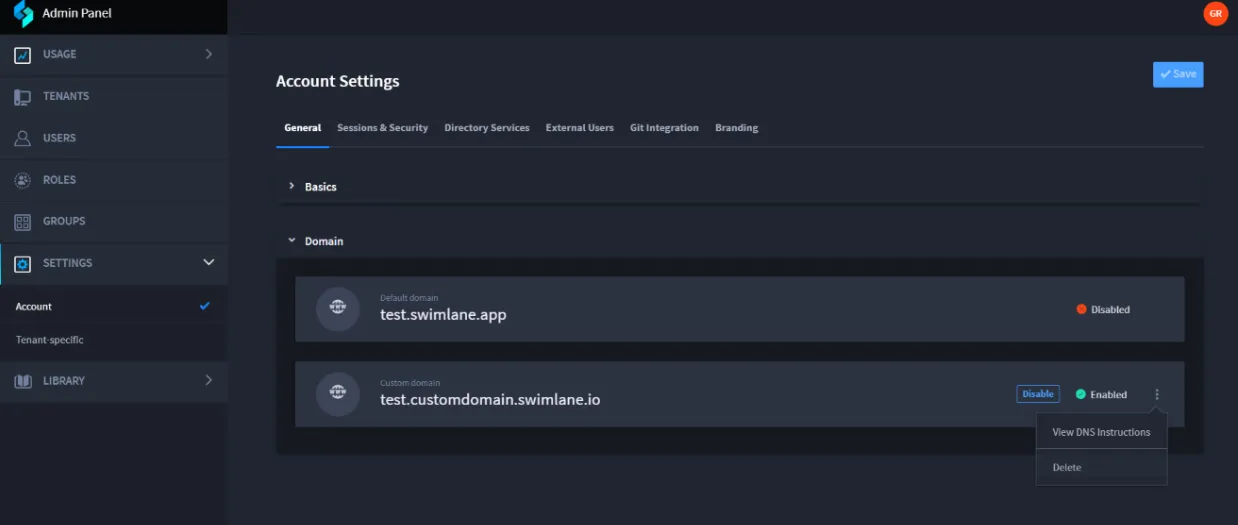
- The custom domain test.customdomain.swimlane.io is removed from the system.
- You will no longer be able to access Swimlane via that domain. To access you have to re-add it and reconfigure DNS.
- Any DNS verification, TLS certificates tied to that custom domain will also be discarded.
- The platform reverts to using the default domain test.swimlane.app, which remains available.
How it Works
URL Behavior:
- Your Swimlane default URL will remain functional after the custom domain is activated. Accessing the Swimlane default URL will redirect users to the custom domain.
- If you deactivate your custom domain,Swimlane default URL will start functioning.
- If the domain configuration is deleted or the product is unlinked from the domain, the custom domain will not revert to the default URL.
Once activated:
- You will be able to access Swimlane using the new custom domain.
- SSL/TLS security will automatically apply, ensuring encrypted and trusted connections.
- You will seamlessly redirect to the custom domain when accessing the platform.
When a custom domain is enabled, all shared links will use your custom domain instead of the default Swimlane domain. These links may be sent to users for purposes such as:
- Password reset
- Scheduled reports
- Report downloads